At a glance
Do you know polymer clay? It's an ideal material for creating figurines and keeping your children entertained on a rainy day while dreaming about future travels...
Lisa, our blogger, is a specialist in modeling with polymer clay, an ideal and creative activity to keep children busy on a rainy day.
She explains how to get started and shares 4 wonderful ideas.
Dream about your future travels by making polymer clay figurines
It’s gray and rainy outside, and you no longer know how to keep your children entertained? Are you dreaming of holidays and travel? Here’s an idea: organize a creative afternoon using polymer clay and take inspiration from the theme of travel by following the 4 practical tutorials below.
What is polymer clay?
Polymer clay is a soft modeling clay that must be baked in the oven to harden. It is sold under several brand names. Since it does not dry out in the air, you can keep a pack of clay or a figurine for a long time and return to it later. Polymer clay is perfect for creating small objects a few centimeters in size. You can find polymer clay in DIY, craft, or hobby stores. A pack of colored clay costs only a few euros, but you can also choose a less expensive set containing several colors. Polymer clay is best stored in a plastic container (protected from air and dust).
The material is very sensitive to dust and dirt. It is therefore recommended to wash your hands and avoid handling it in an area that is not completely clean.
What do you need?
- You need at least one or two free hours (or more if you feel inspired).
- A clean workspace: a table or cutting board covered with baking paper. Before starting, roll a piece of clay over your workspace and your hands. Any dust or impurities will stick to it. This helps ensure that no dust or hairs end up on your figurines. Keep this piece of clay as a permanent "cleaning piece."

- Polymer clay of your preferred brand. While you are free to choose your favorite colors, it is useful to have black and white. Not only are they practical basic colors that can be mixed to create different shades of gray, but you will also need them for the travel journal and camera tutorials in this article.
- A small knife. (Even if it is not sharp, an adult supervising children should always make sure younger children use it properly.)
- A needle. Tip: make a handle for your needle by attaching a piece of polymer clay to it. Bake the needle inside the clay, let it cool, and you will have a handmade tool that is easier to hold!
- To roll out the clay: a rolling pin or a clean, empty glass bottle.
It is also fun to glue paper decorations onto the figurines afterward. Decoupage glue (glue varnish) works perfectly.
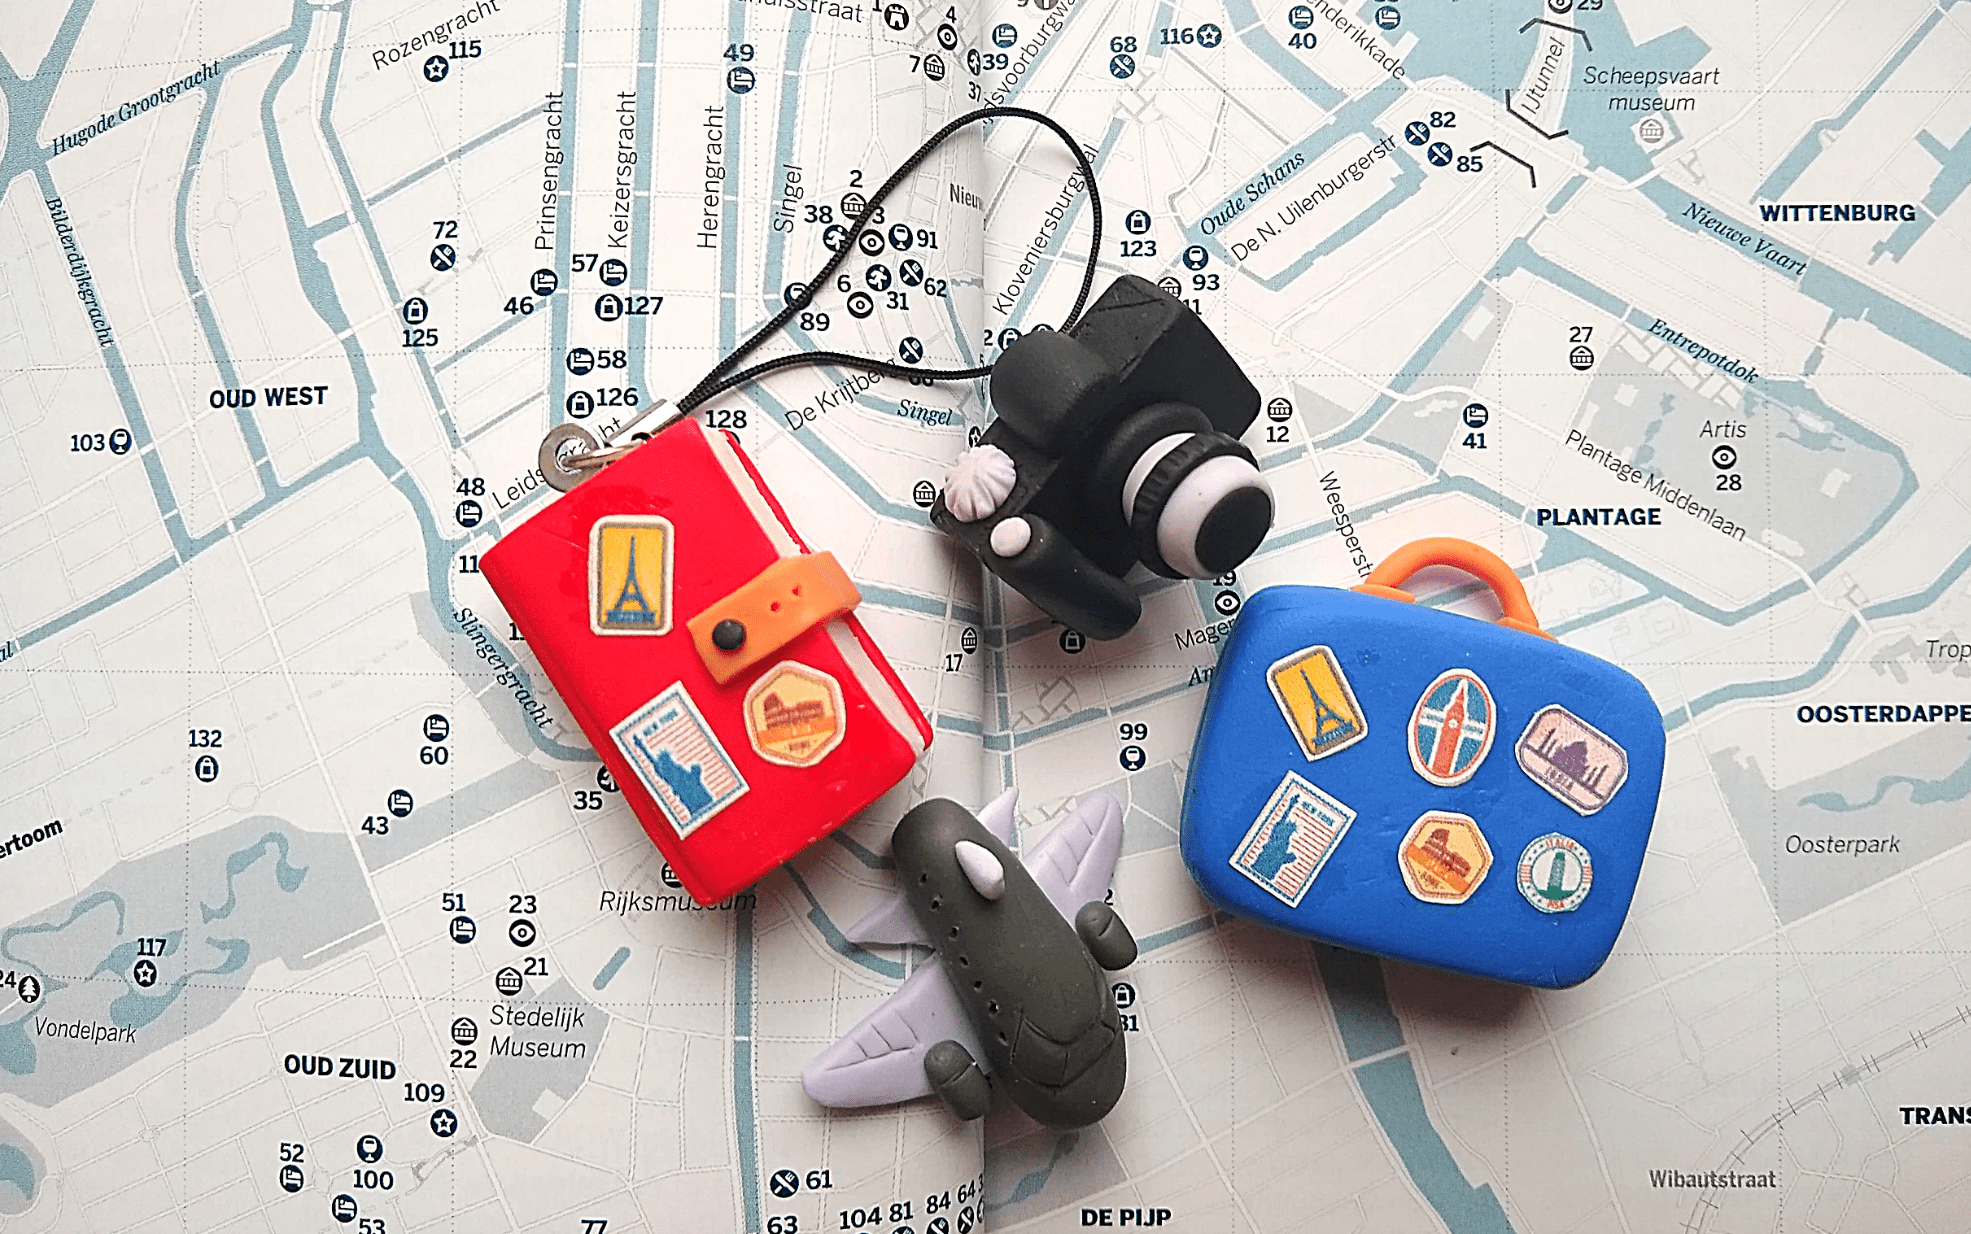
Are you ready to start the adventure? The 4 tutorials below will give you some creative ideas! The suitcase and travel journal can easily be made by children aged 8 and over. For the airplane and camera, they may need some help from an adult. The smaller your creation is, the more carefully you will need to work. The tutorials below show creations approximately 4 cm in size.
1. A suitcase
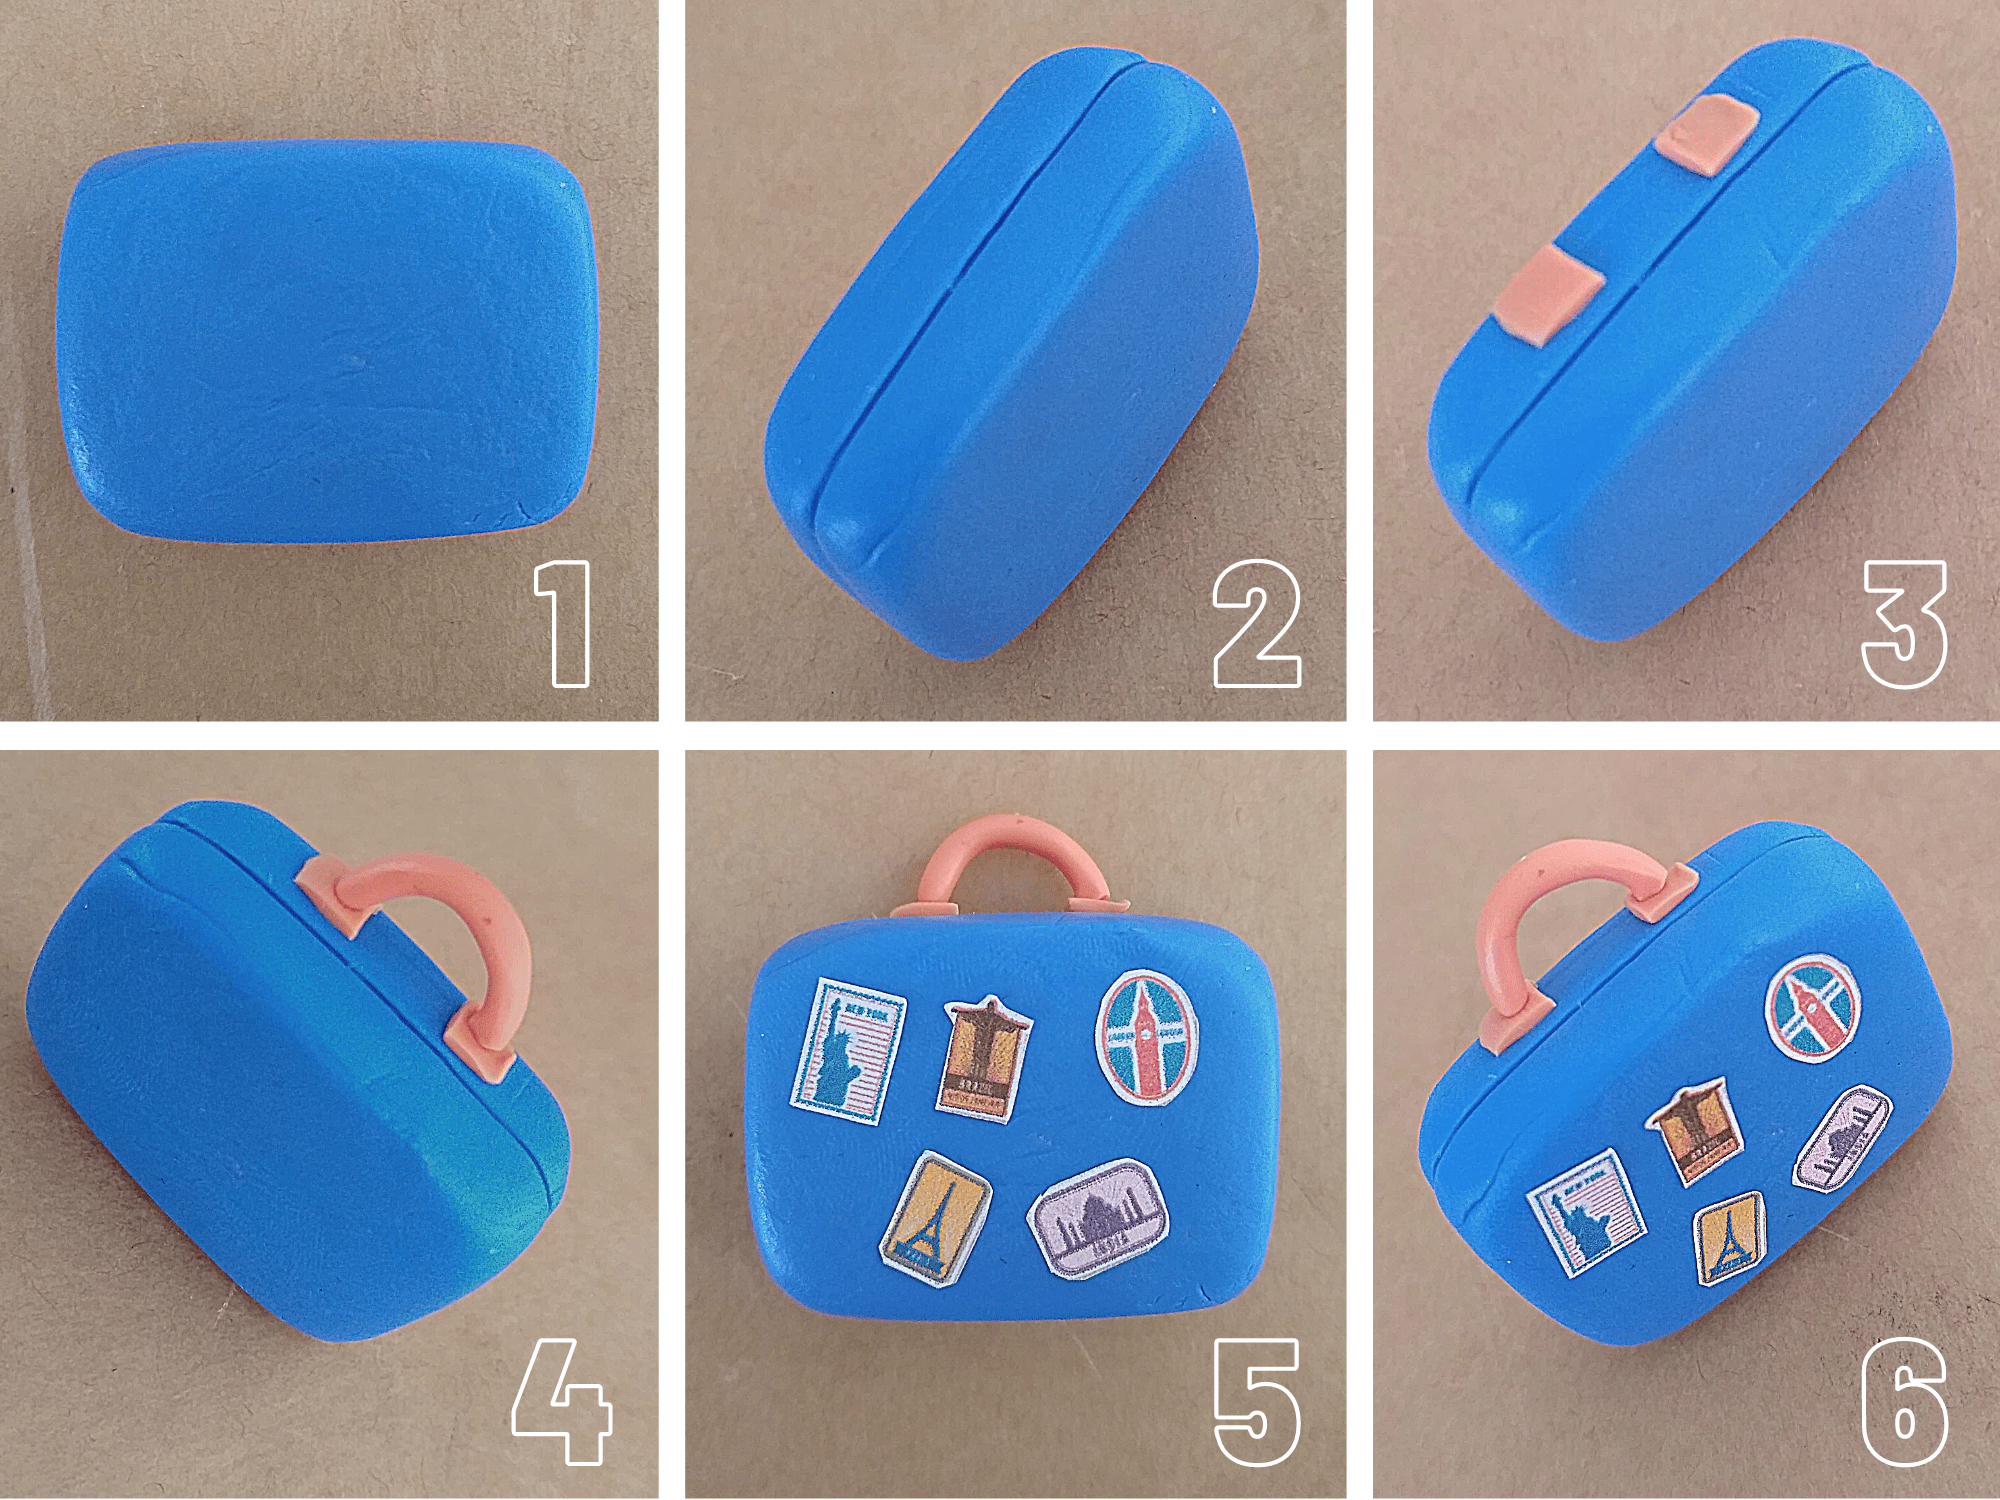
- Shape a small rounded block of clay in the color of your choice.
- Using the knife, make a cut in the center of one of the longest sides. Do the same on the two shorter sides to create the impression of a suitcase made of two halves. Tip: Is your figurine too soft to cut? Put it in the refrigerator for 15 minutes to harden.
- Attach two small flat strips of clay to the top of the suitcase.
- Make a small strip of clay to form a handle by gently pressing it onto the flat pieces.
- Bake the clay. Once it has cooled, use decoupage glue to attach decorations.
- Want your suitcase to shine? Apply the glue varnish over the entire surface. But be careful: varnish only one side at a time, otherwise your object may stick to the table.
2. A small airplane
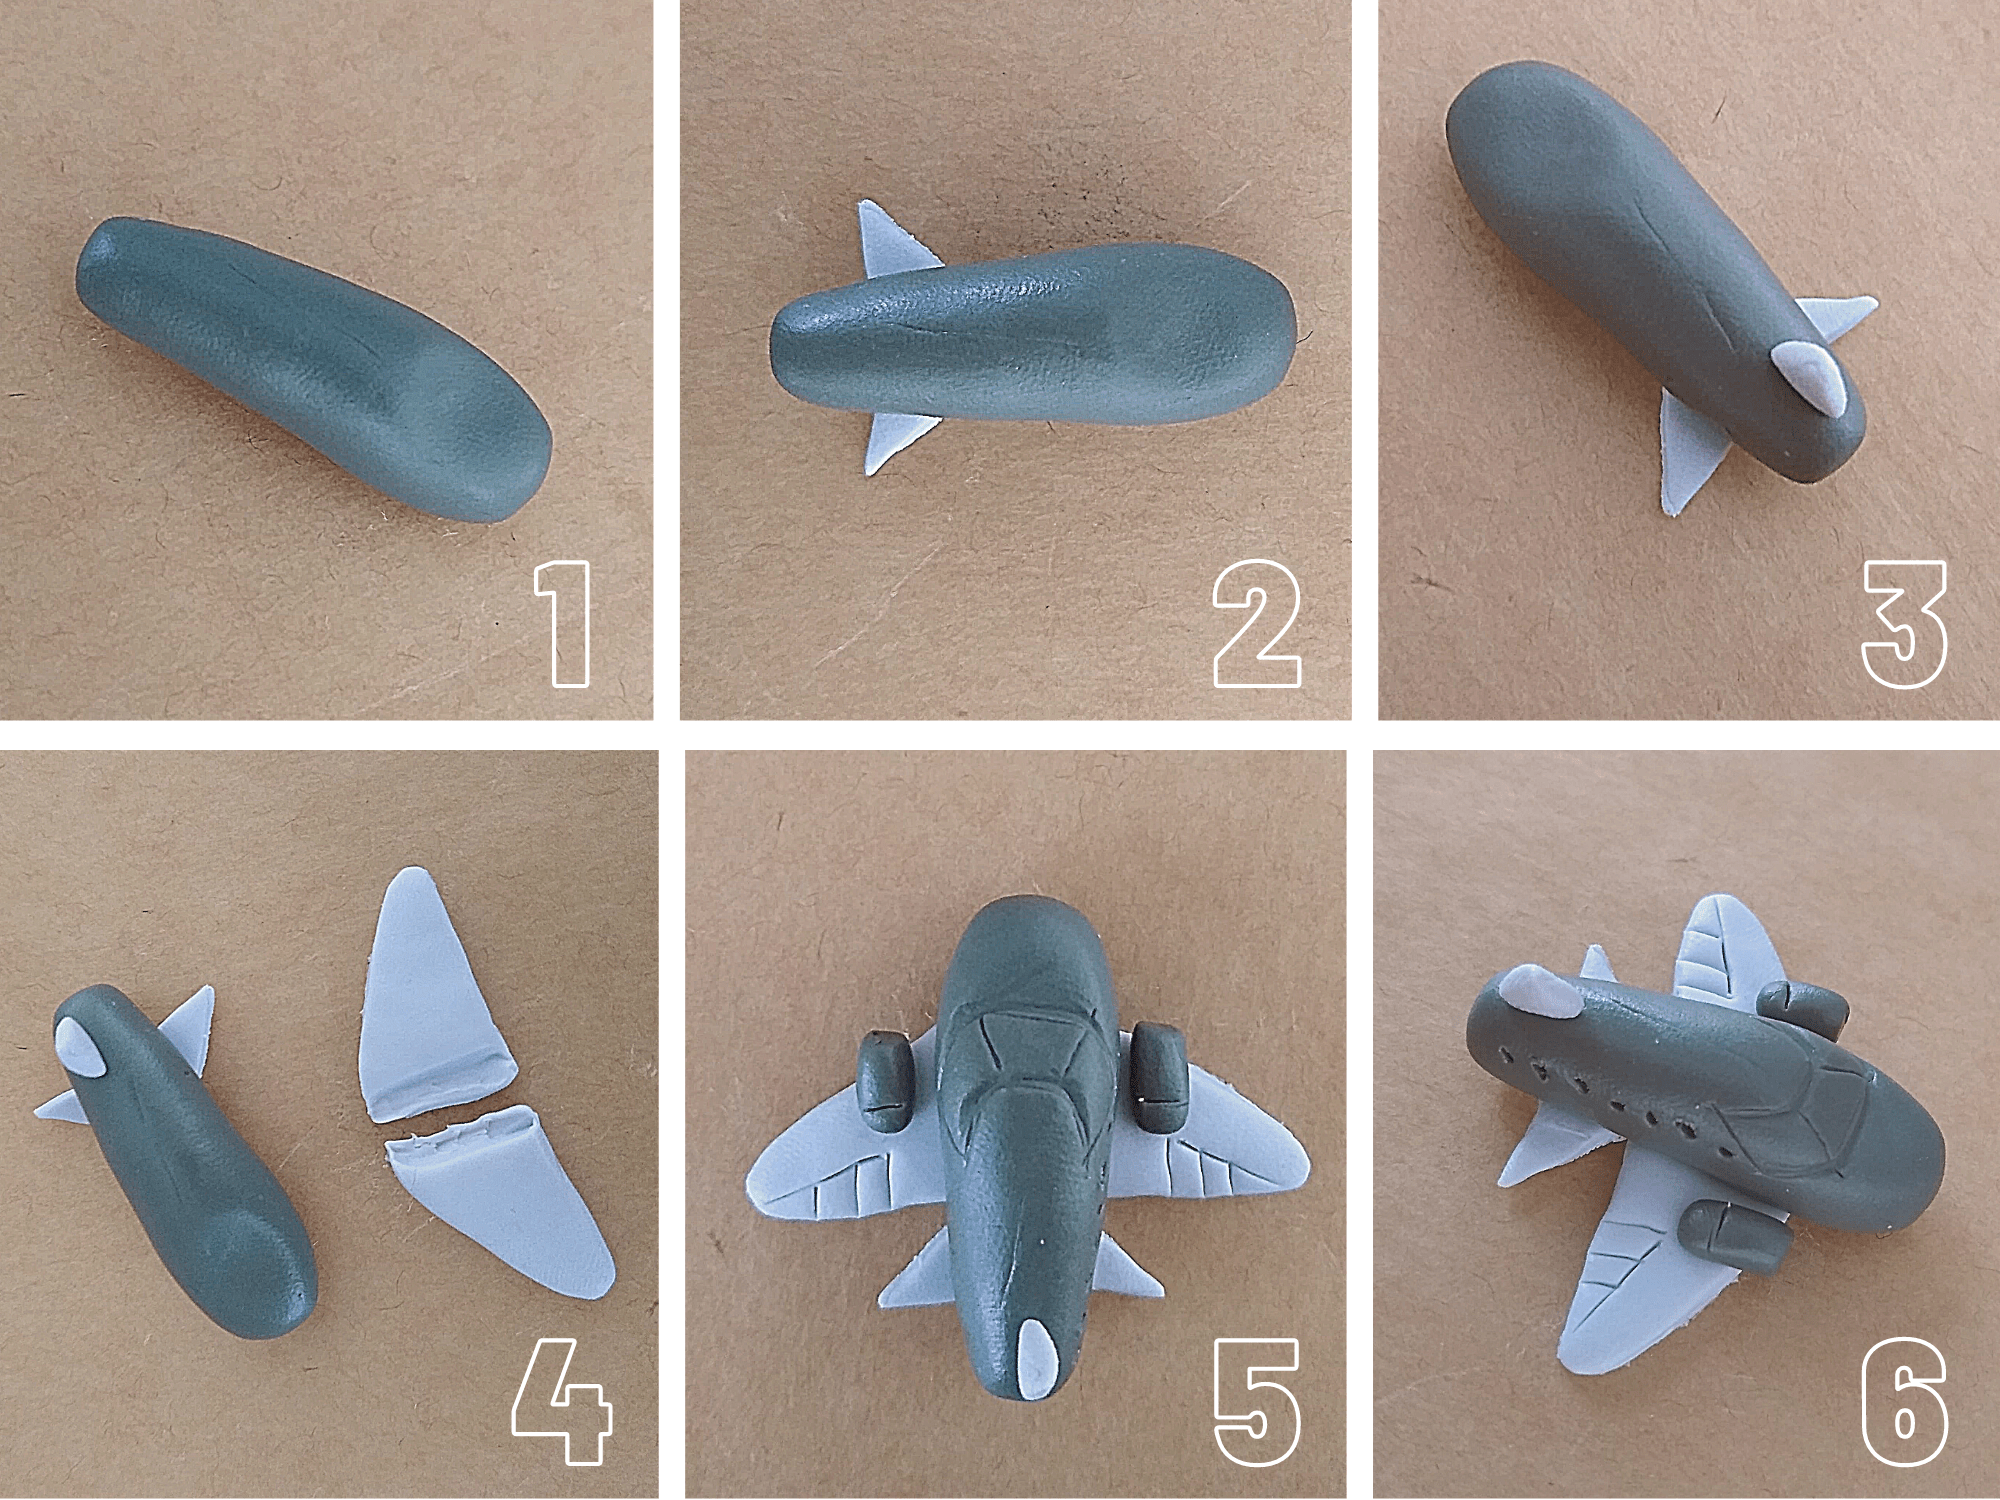 ]
- Shape a rectangular piece of clay with one end slightly larger. Gently press the larger side with your thumb to create the airplane’s “nose.”
- Attach two triangular wings to the end of the tail.
- Make a similar small wing for the top of the tail.
- Create the two large wings. They can have sharp edges if cut with a knife, or you can round them off. Since they will be attached underneath the airplane, gently press the wider ends with your fingers to position them securely.
- Use two small pieces of clay as engines. With your knife, draw the shape of the windows and wing flaps.
- To make the windows, gently push the needle into the sides of the airplane and twist it until the holes are large enough.
3. A travel journal
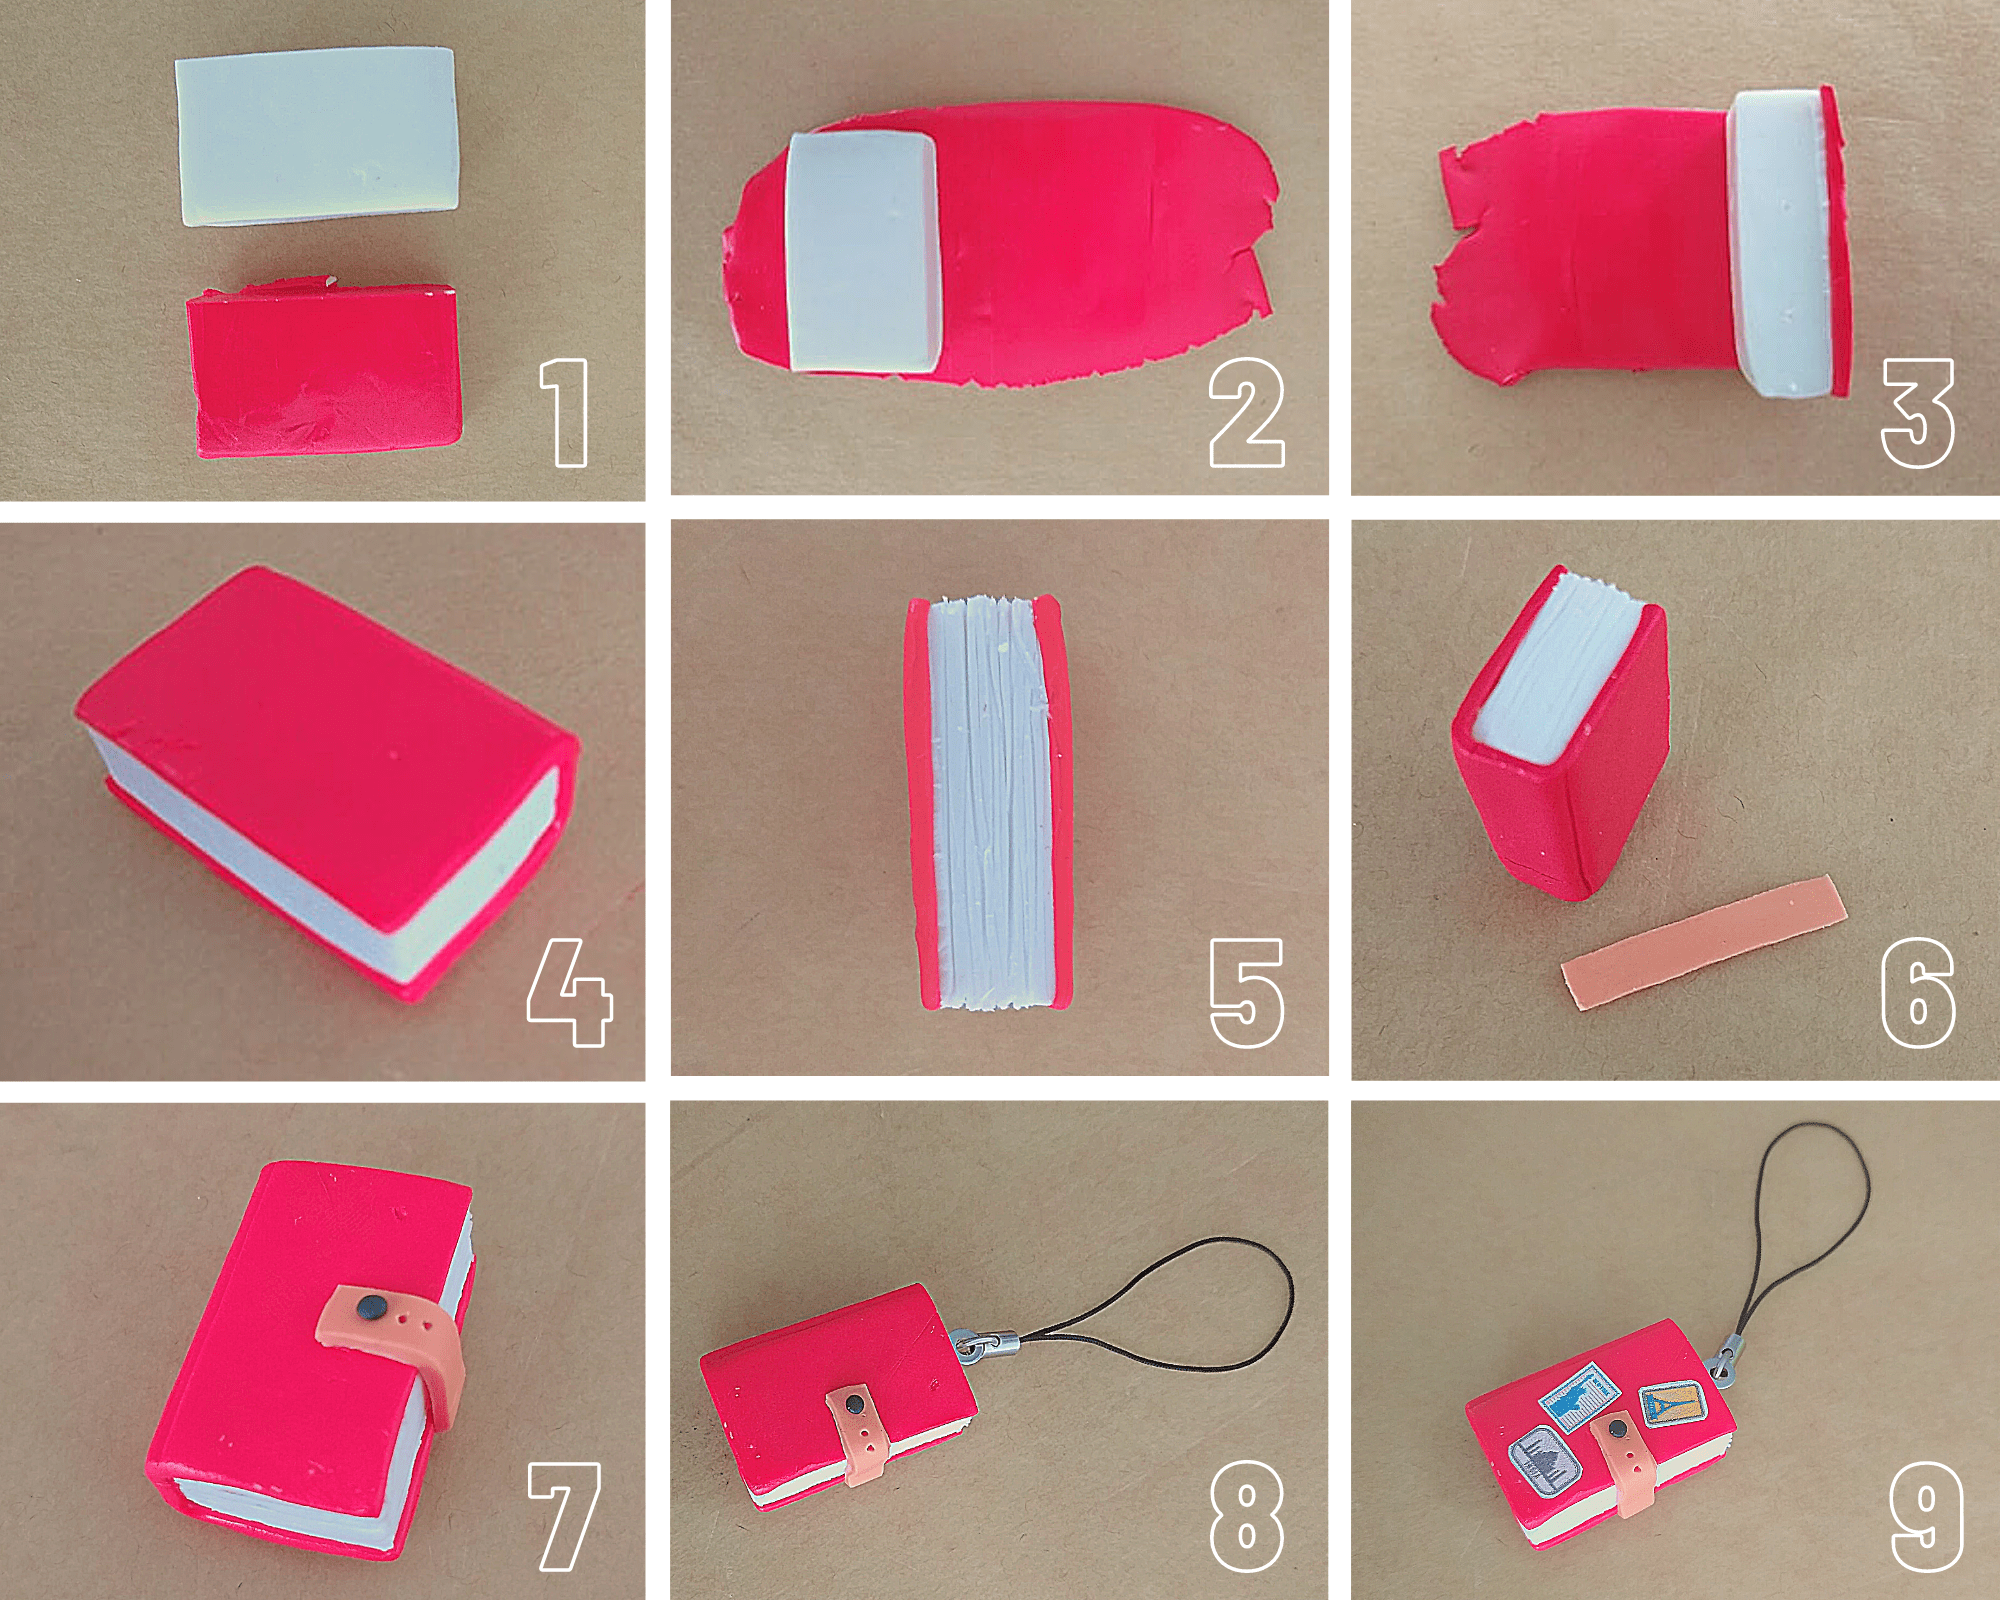 ]
- Shape a rectangular block of white clay. For the journal cover, roll out a sheet of clay in the color of your choice using a glass bottle or rolling pin.
- Place the white block on top of the rolled-out colored clay.
- Using your knife, cut the colored clay to match the exact shape of the white block.
- Fold the colored clay around the white block and trim the excess on the other side as well.
- Create pages by gently carving lines into the sides of the white clay with your knife.
- Roll a small piece of clay and cut it into the shape of a narrow rectangle.
- Attach the rectangle as a strap around the journal. Make a knot using a small ball of dark clay and poke holes next to the knot with your needle.
- Helpful tip: To make jewelry or key chains, simply insert metal findings into the uncooked clay. The metal parts can be baked together with the clay.
- Glue decorations onto the travel journal using decoupage glue.
4. A camera
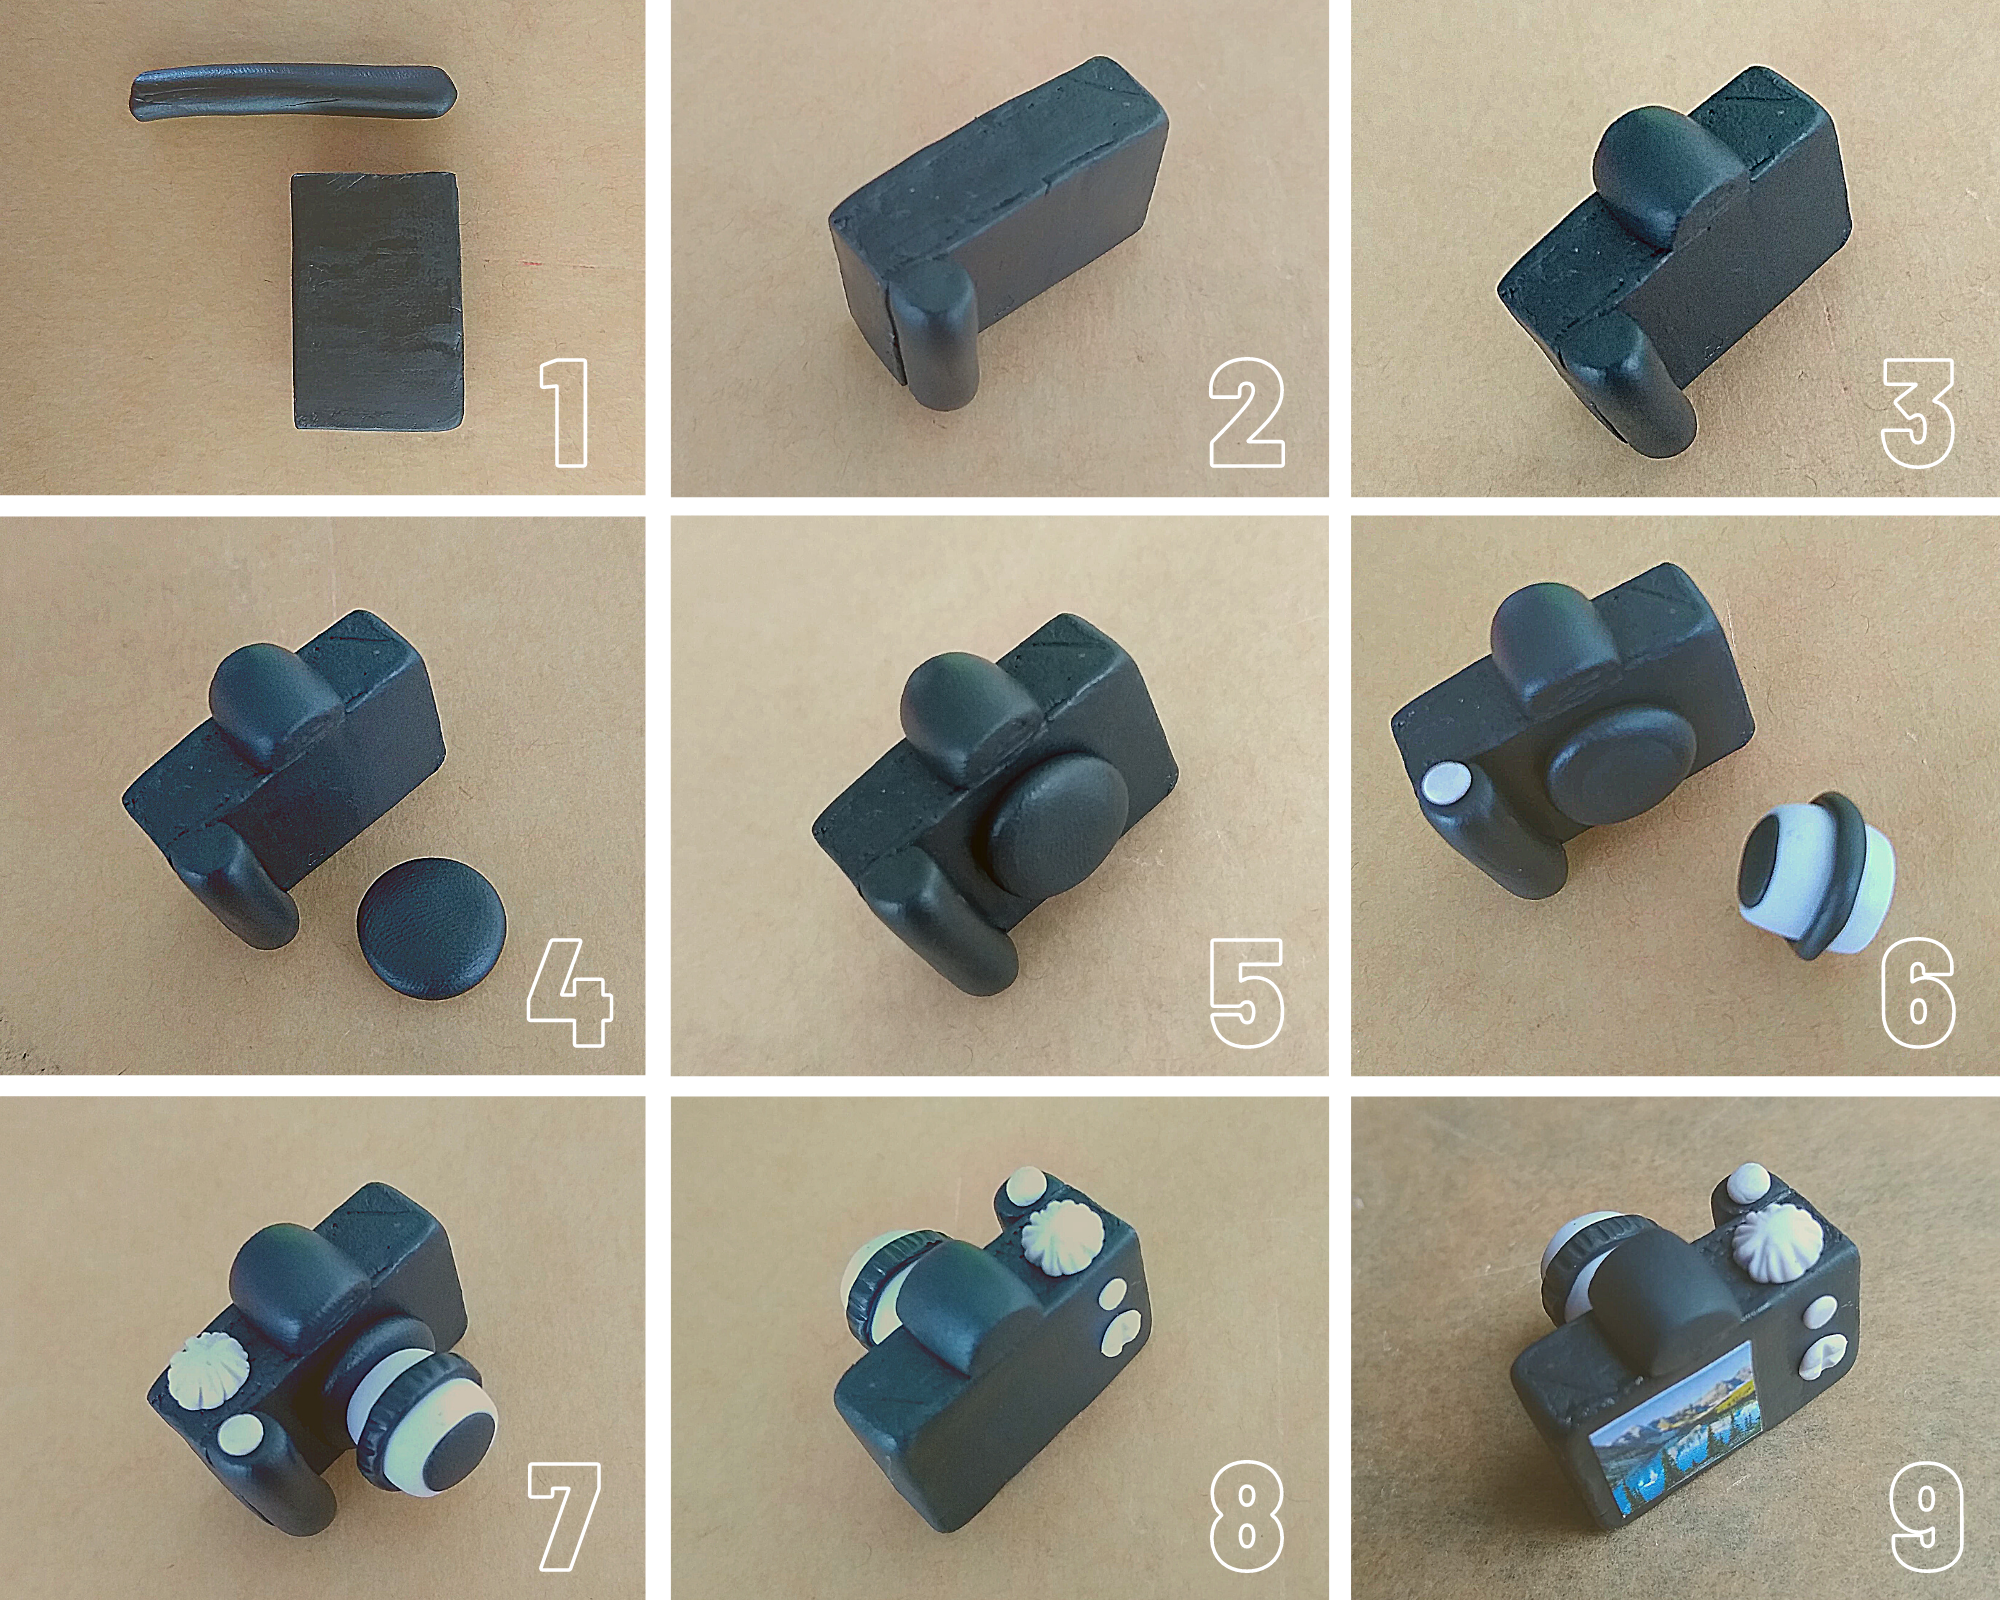
- Shape a rectangular block of black clay. For the side of the camera, make a small roll of clay.
- Attach the roll to the side of the block. Trim any excess clay with your knife.
- Attach another piece of clay to the top of the block.
- Make a small ball and flatten it with your thumb. Ensure it is almost as tall as the block.
- Gently press the flat circle against the block.
- Making the lens: Roll a piece of clay into a cylinder (preferably in a different color for contrast), add another small flat circular piece to one end, and wrap a thin string around the cylinder.
- Before attaching the cylinder to the flat circular piece, use your needle to make small notches in the string. This creates the ring used to adjust the focus around the camera lens. You can also add buttons on top.
- On the back, create as many buttons as you like. Use your needle to engrave symbols into them.
- Once your camera has been baked, you can glue on a small picture to represent the camera display.
And now, baking time...
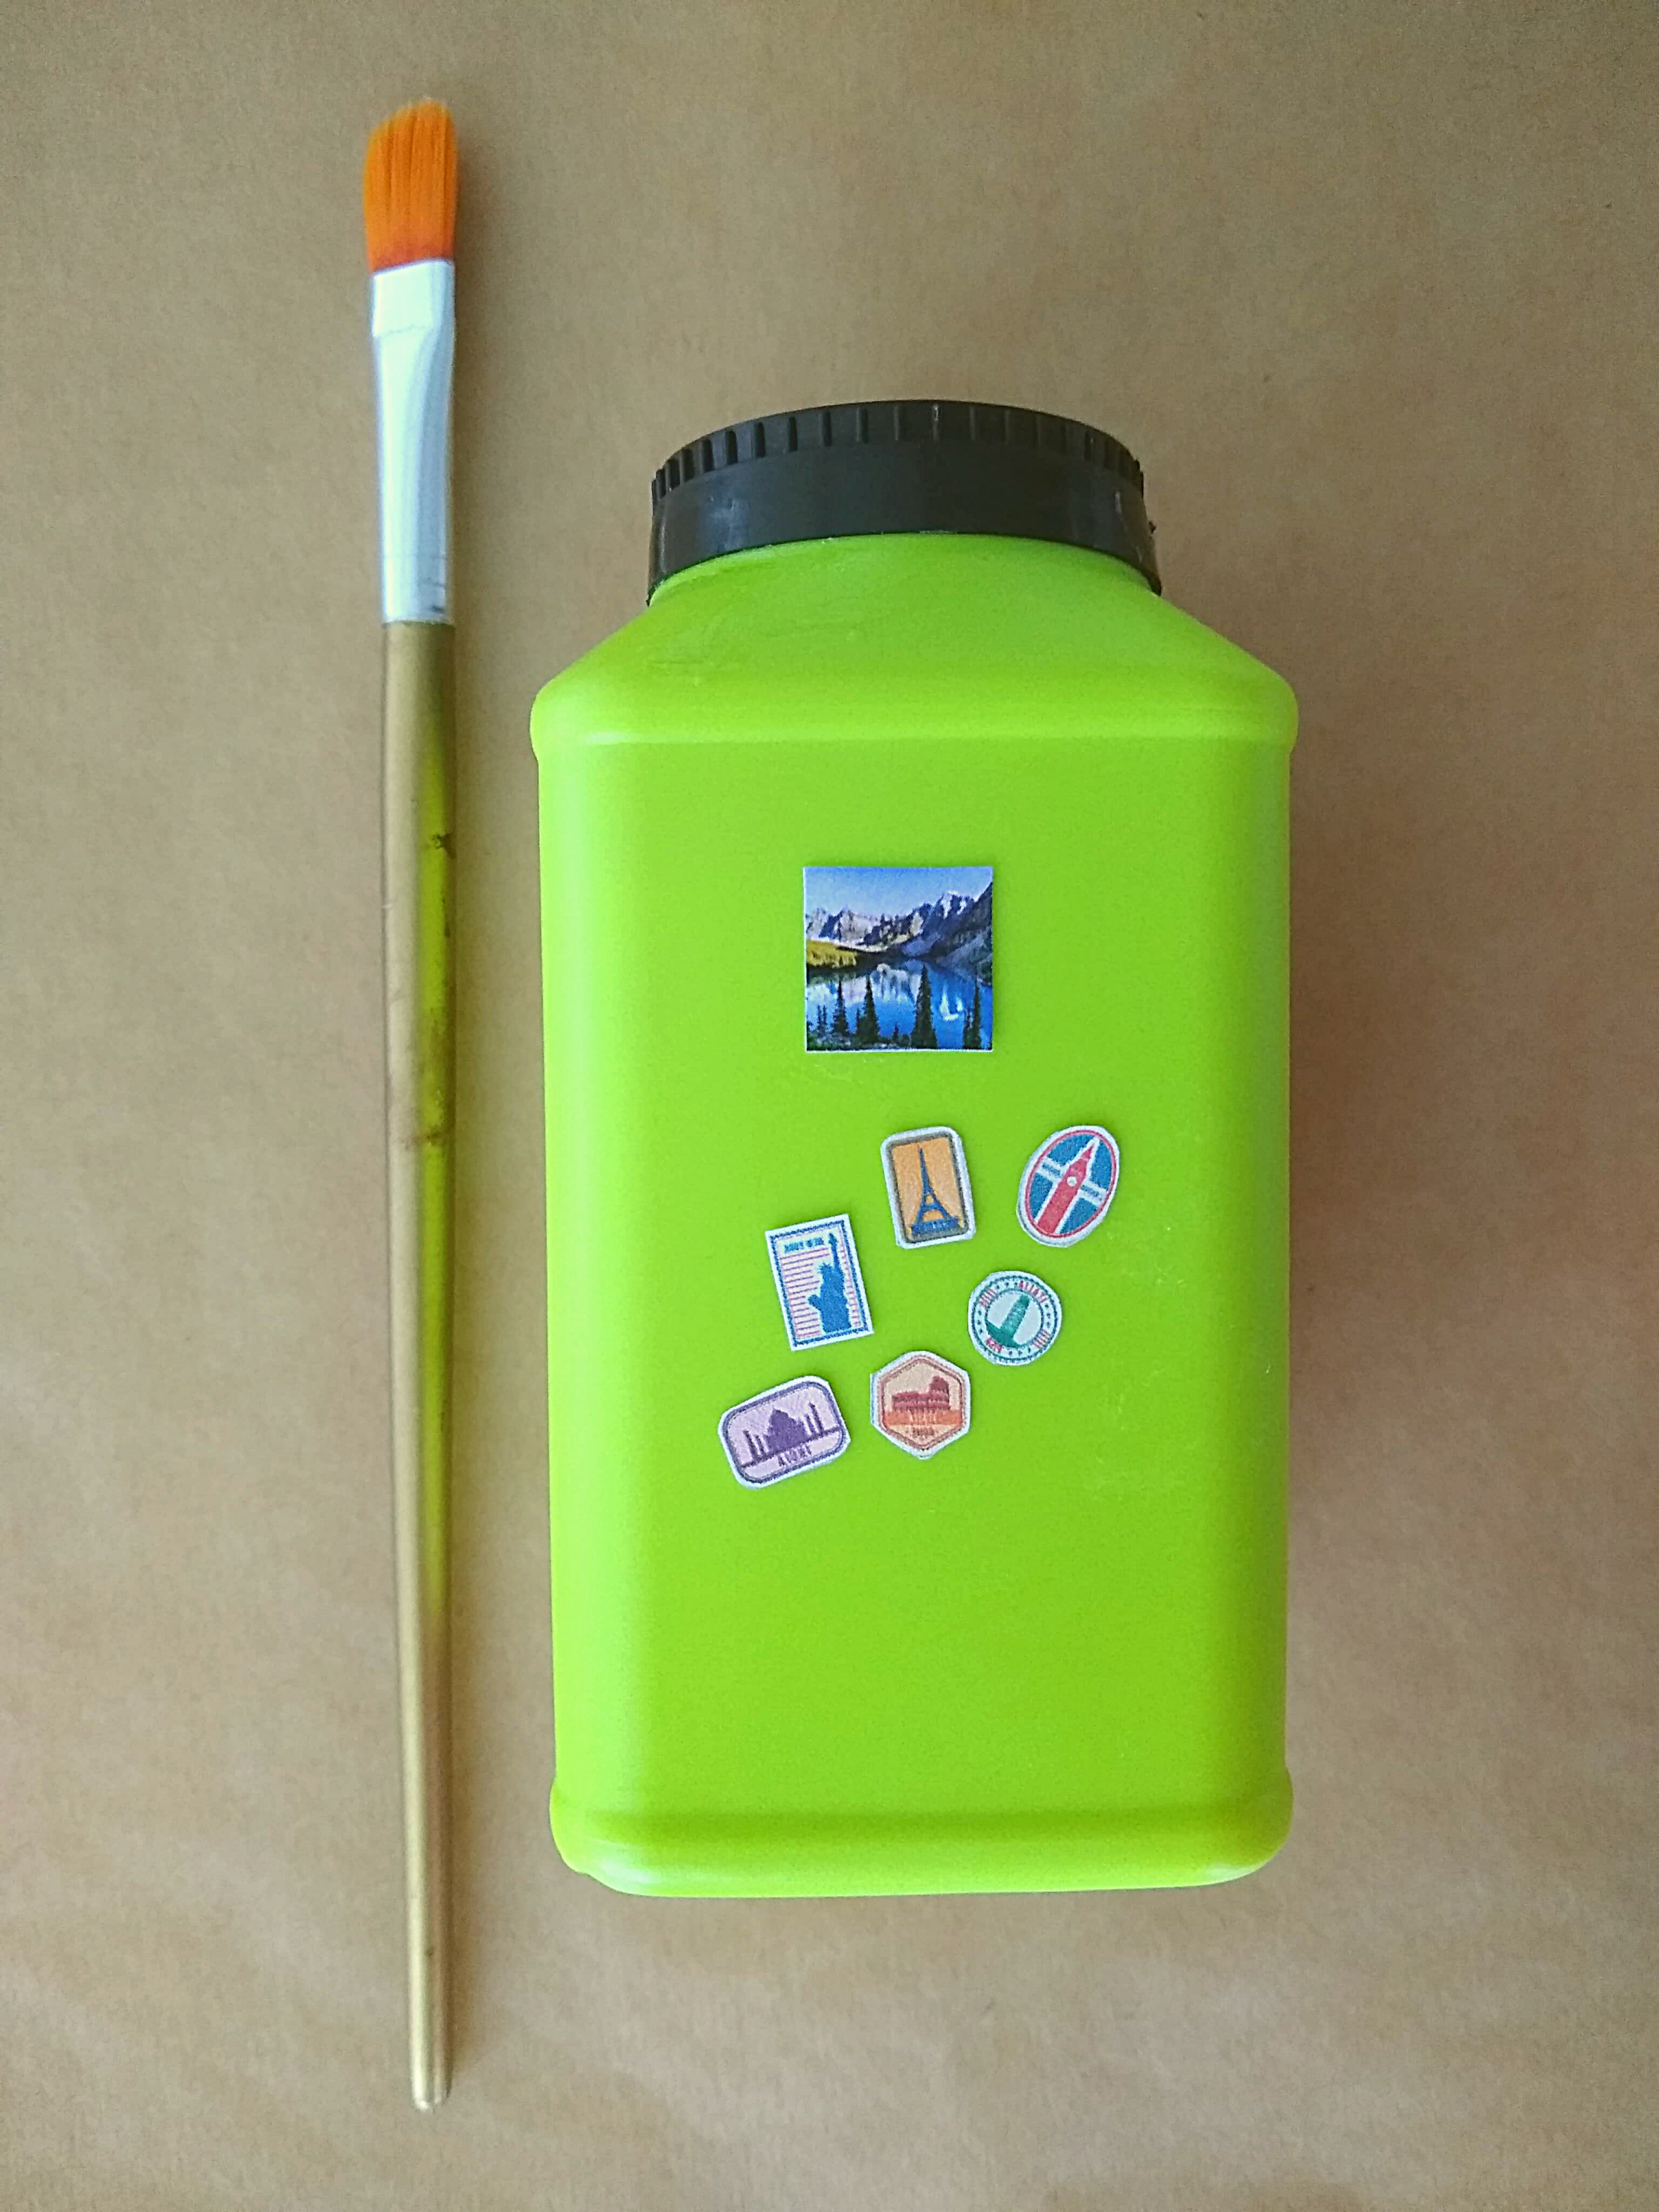 Are you happy with your results? Then it’s time for the oven! Bake the clay for half an hour at 110°C (230°F). To prevent the clay from sticking to the baking tray, place it on baking paper. After baking, leave your figurines to cool in the oven for several hours. A sudden temperature change may cause the clay to crack!
You can then glue decorations onto your figurines using decoupage glue.
Tip: To prevent the clay from cracking, you can cover it with aluminum foil, but make sure the foil does not touch the figurine, as it may stick to it.
 Our blogger Lisa :
**Lisa is an independent blogger who has just spent a year exploring Australia alone in a Jeep. When she’s not traveling, you’ll often find her at home on her couch with her rabbit Nelson on her lap and a language course in hand.